Automation, Programming, Spikemark, Tips
Spikemark and WATCHOUT: Step by Step
Back in August, we introduced Spikemark’s WATCHOUT integration which makes it easy to synchronize projection with the motion of automated scenery. Several theatres have used this new feature to great effect, but I wanted to take a little time today and show how everyone can take advantage of this fun capability.
DISCLAIMER: I am not an expert in WATCHOUT, so this small tutorial is written from the perspective of an automation operator, not a projection wizard.
Alright, let’s get started.
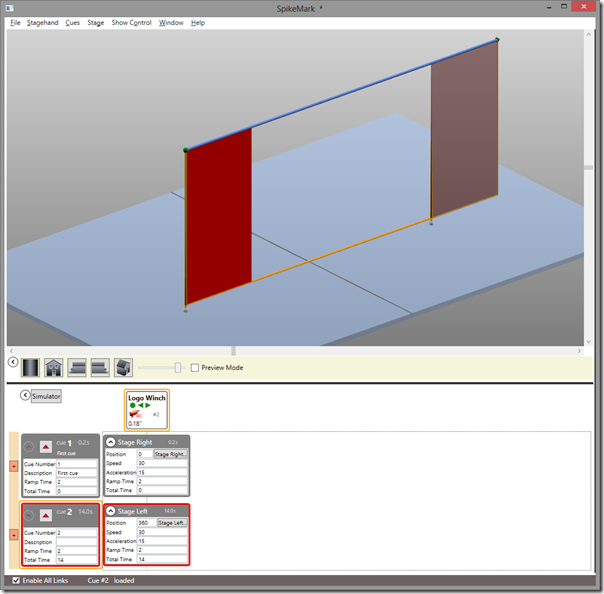
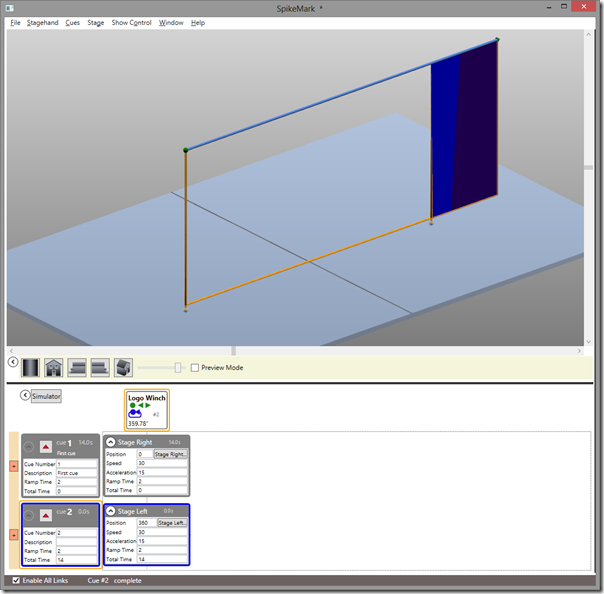
Assume that we have a little show with an automated wall panel attached to a traveler track. On cue, the wall panel will track from Stage Right to Stage Left. As the panel tracks across the stage, we need to project a graphic onto the panel and have the image move along as if it were glued to the panel. Here’s a screen shot of the Spikemark cue:
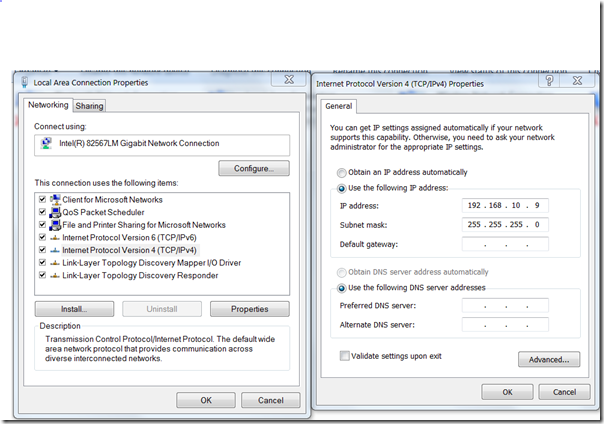
In order for WATCHOUT’s projectors to track an image synchronously with the motorized panel, we need to send the position of the panel to WATCHOUT. Spikemark will communicate with WATCHOUT over the Ethernet network, so both the Spikemark automation computer and the WATCHOUT production computer need to be plugged into the same physical network. In addition, the two computers need to have compatible IP Addresses that share the first three segments of the address with unique fourth segments. I have the addresses assigned as such:
Spikemark computer is 192.168.10.119
And the WATCHOUT computer is 192.168.10.9
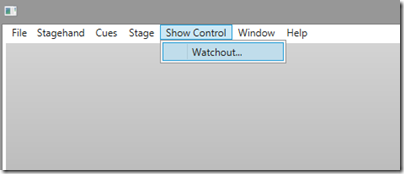
With both computers addressed properly, we need to tell Spikemark where to send the position data. In Spikemark select Show Control –> Watchout from the menu.
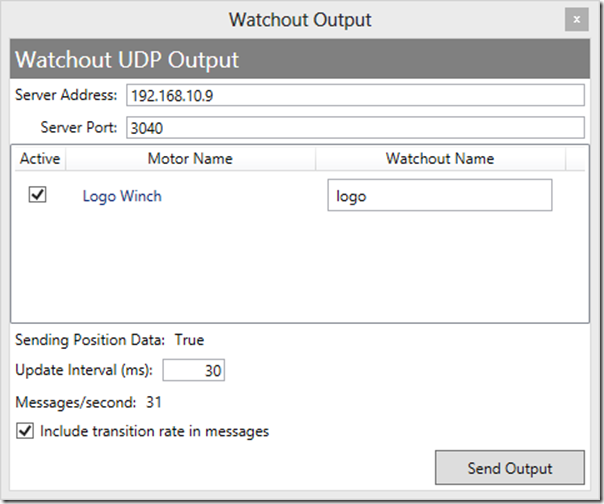
A dialog pops up with some configuration details that determine what data is sent to WATCHOUT.
From the top the options are:
- Server Address: The IP Address of the WATCHOUT production computer
- Server Port: The port where WATCHOUT listens for incoming data. By default, WATCHOUT listens on 3040.
- Motor List: Each motor in your show is listed. If the Active box is checked, that motor’s position information will be sent to WATCHOUT. In the Watchout Name text box you can enter a name that will be used inside WATCHOUT to identify the motor’s position. The Spikemark motor name and the WATCHOUT name can map however you like. For example, we could have called it “Logo Winch” in Spikemark and “fuzzy pink rabbit” in Watchout.
- Sending Position Data: Indicates whether Spikemark is currently sending UDP packets to the address indicated in Server Address.
- Update Interval (ms): The frequency with which Spikemark will send position updates to WATCHOUT. The number entered here will determine how many milliseconds should elapse between updates, so higher numbers will result in a slower update cycle. In practice, 30ms is about the fastest rate consistently possible without adversely affecting Spikemark’s performance.
- Messages/second: The number of position updates that are actually being sent to WATCHOUT each second. This number will often bounce around by 1 or 2 messages.
- Include transition rate in messages: If checked, Spikemark will send WATCHOUT the number of milliseconds that have elapsed since the last position update. WATCHOUT can use this information to smooth the animation of the image as it tracks with the motor. This generally results in a smoother visual result, but can be slightly inaccurate. Feel free to experiment with either setting to get the most appropriate result for your show.
- Send Output: This is a toggle button to turn on/off the data stream from Spikemark. The data is sent via UDP, which is a connectionless protocol, so there is no harm sending out the packets even if WATCHOUT is disconnected from the network. UDP packets will blissfully fall into oblivion if the server is not around to receive them so you can start the output stream before WATCHOUT is running.
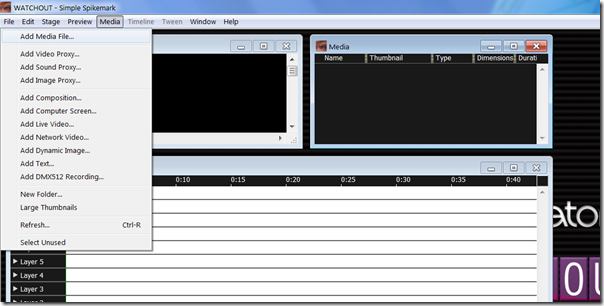
With Spikemark configured and the Send Output button depressed, we are ready to fire up the WATCHOUT production machine. Start WATCHOUT and give your show file a name. As I mentioned when we started, I need an image to be projected on the traveller panel, so our first step in WATCHOUT is to import an image.
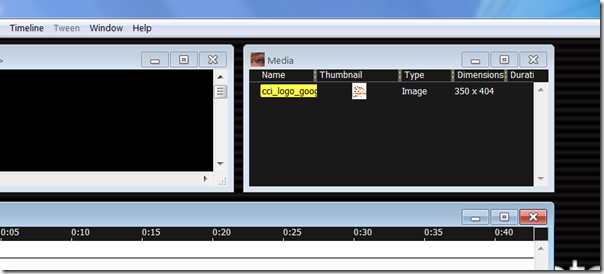
I selected a Creative Conners Logo image, which shows up in the Media list.
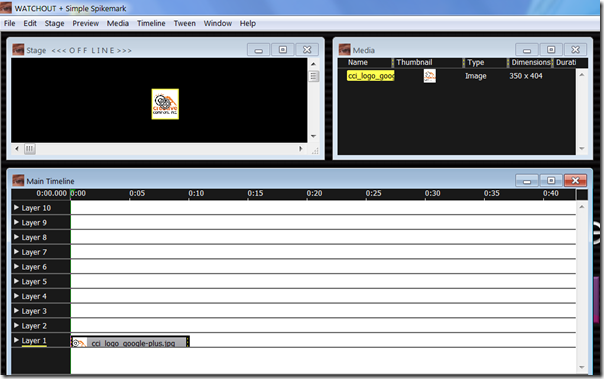
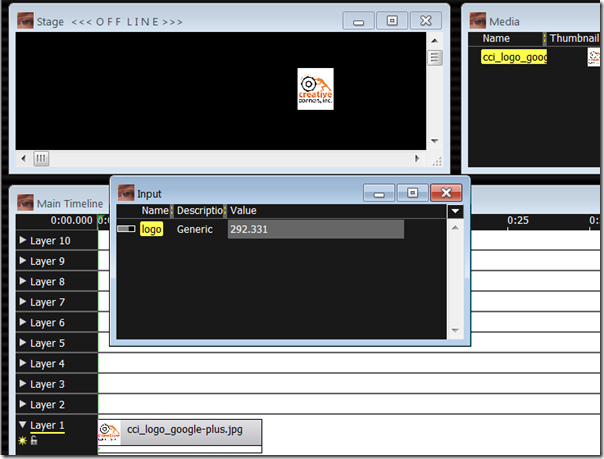
Now drag the image from the Media list into the Stage window. You can see the image displayed in the center of the Stage view and it also shows up in the Main Timeline.
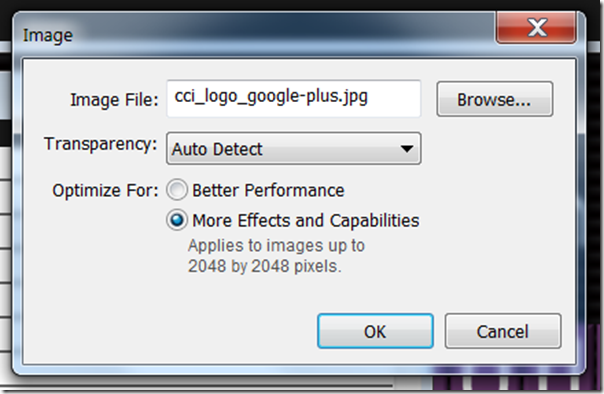
With the image on our virtual stage, we need start configuring WATCHOUT to listen for data from Spikemark. We have to enable an external source (Spikemark in this case) to control the image position. Double-click on the image in the Media List and select More Effects and Capabilities.
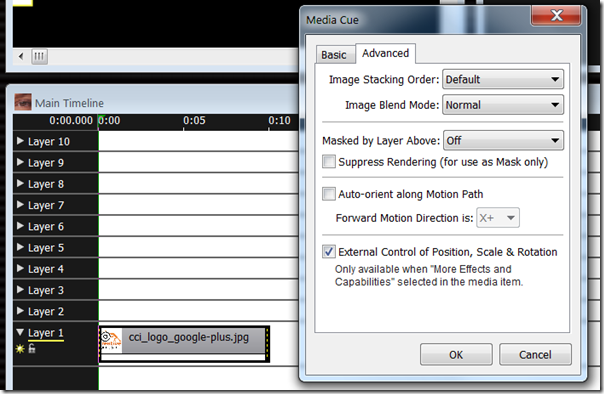
Then, in the Main Timeline, double-click on the image layer to bring up the Media Cue properties window. Select the Advanced tab and check External Control of Position, Scale & Rotation.
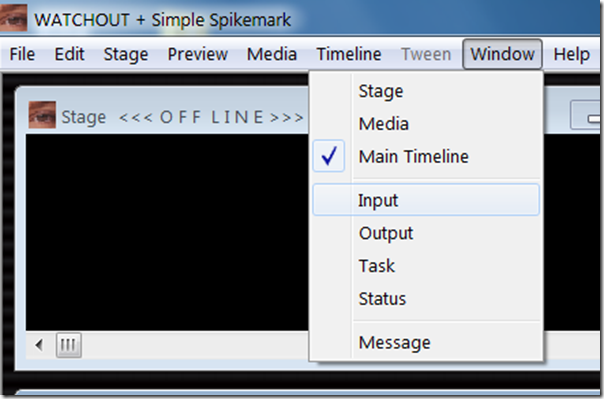
Our next step is to create a Generic Input in WATCHOUT that has a name that matches the Watchout Name we entered into Spikemark. We will use the data received from that Generic Input to move the image around. To add a Generic Input select Input from the Window menu.
From the Input window, click on the little triangle in the upper right corner. From the menu that appears, select Add Generic Input.
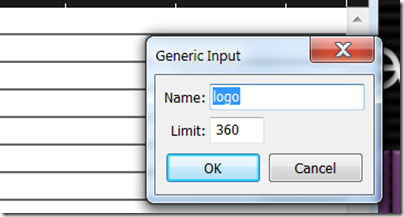
A dialog is presented where you can enter the Name of the input and the Limit of the input value. This step is important to get correct. The Name needs to match the name entered in the Spikemark Watchout Output window… exactly, same case, same spelling, etc. The Limit should match the highest value expected to come from Spikemark. In this case, our traveler has a maximum forward position of 360”, so we can enter 360.
Press the OK button and then the new Generic Input will be listed in the Input list with its current value set to 0.00.
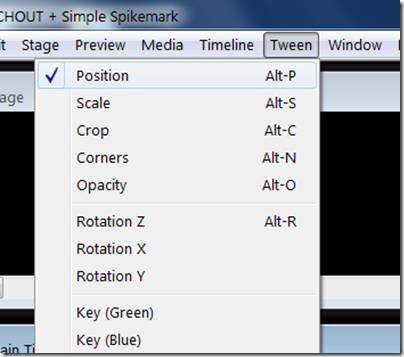
Now, the next step is to connect the value of the Generic Input to the x-axis of the Image so that the Image will move as the Generic Input value changes. To link the image position to the Generic Input value we will create a formula in the Main Timeline. Select the image layer in the Main Timeline, and then from the Tween menu select Position.
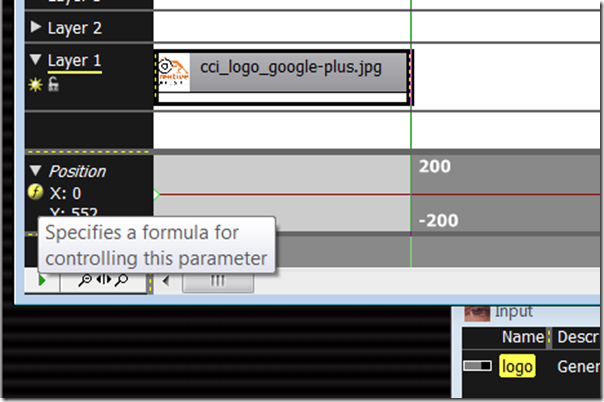
This adds a Position tween track below Layer 1 in the Main Timeline. This is the good part. Now that we have a tween for Position, on the left side of the track there is a little round button with an “f” inside. That allows us to write a formula that will link the position of the image to the value of the Generic Input, the value of the Generic Input will be connected to the data stream from Spikemark, the data stream from Spikemark is driven by the position of the scenery. The knee bone is connected to the leg bone… still with me? Great, click the little “f”unction button.
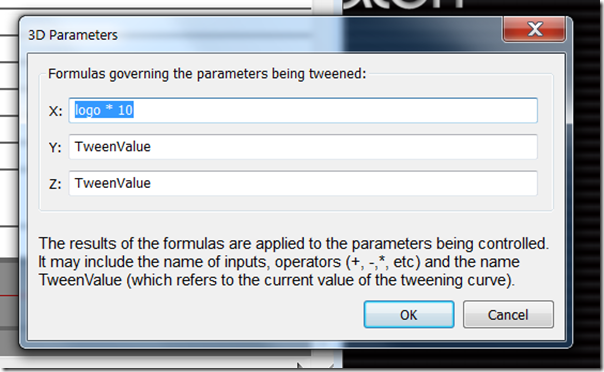
In the dialog box that appears, we enter in a formula in the X axis text box. Since this is a traveler track, we want to manipulate the lateral position of the image, but if it was a flying piece of scenery we could instead control the Y axis of the image. To use the value of the Generic Input, we simply type the name of the input. In this case, I’m multiplying the value of the input by 10 to get the image to track the correct number of pixels across the stage. The multiplier you use can be adjusted to fit the specific show.
We are almost there. Before flipping the last switch to connect Spikemark to Watchout, try clicking around in the Value column of the Input list. This will manually adjust the value of the Generic Input and if everything is correct so far, as you alter the Generic Input Value the image should jump to a new X position in the Stage window.
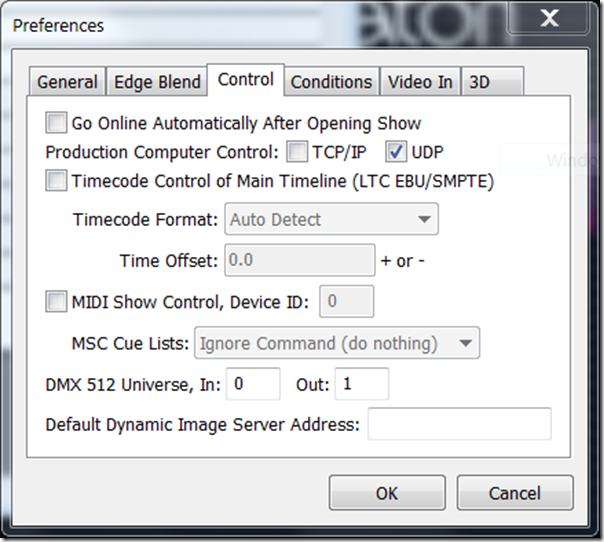
Alright, let’s get the WATCHOUT computer listening to the Spikemark computer. From the File menu select Preferences. Then from the Control tab, check the UDP box next to Production Computer Control.
As soon as you click OK, WATCHOUT will start picking up the position data stream from Spikemark (assuming you depressed the Send Output button in Spikemark) and the image will snap back to match its X position with the motor position. Also, the Generic Input Value should track with the motor position.
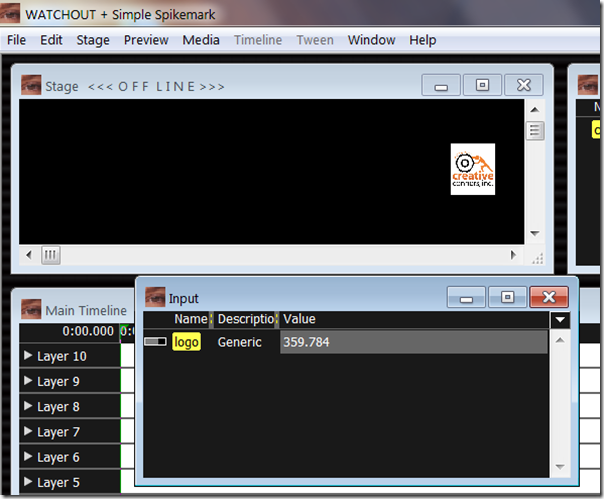
Let’s load up cue #2 in Spikemark. Notice that the current motor position is 0.18” in Spikemark, and that the Generic Input Value in WATCHOUT is 0.175 showing that the two systems are communicating.
Now, let’s run cue #2 in Spikemark. When it completes, we can see that the image tracked across the stage in WATCHOUT, matching the motor position!
I hope this gives you a little inspiration to create some stunning stage effects. This tutorial is just a taste of what can be achieved when Spikemark and WATCHOUT are used together in live theatre. As you start using this feature in production, please let us know how it works for you and send us some video. We love to see this stuff in action.








No Comments
Mark Watzl
Fantastic! What was once difficult and expensive is ready for the masses…Theatrically speaking of course.
ian
Absolutely, Mark!